Unboxing the M-Hat
Before you get started, let's make sure you have everything you need and know what each item is for.
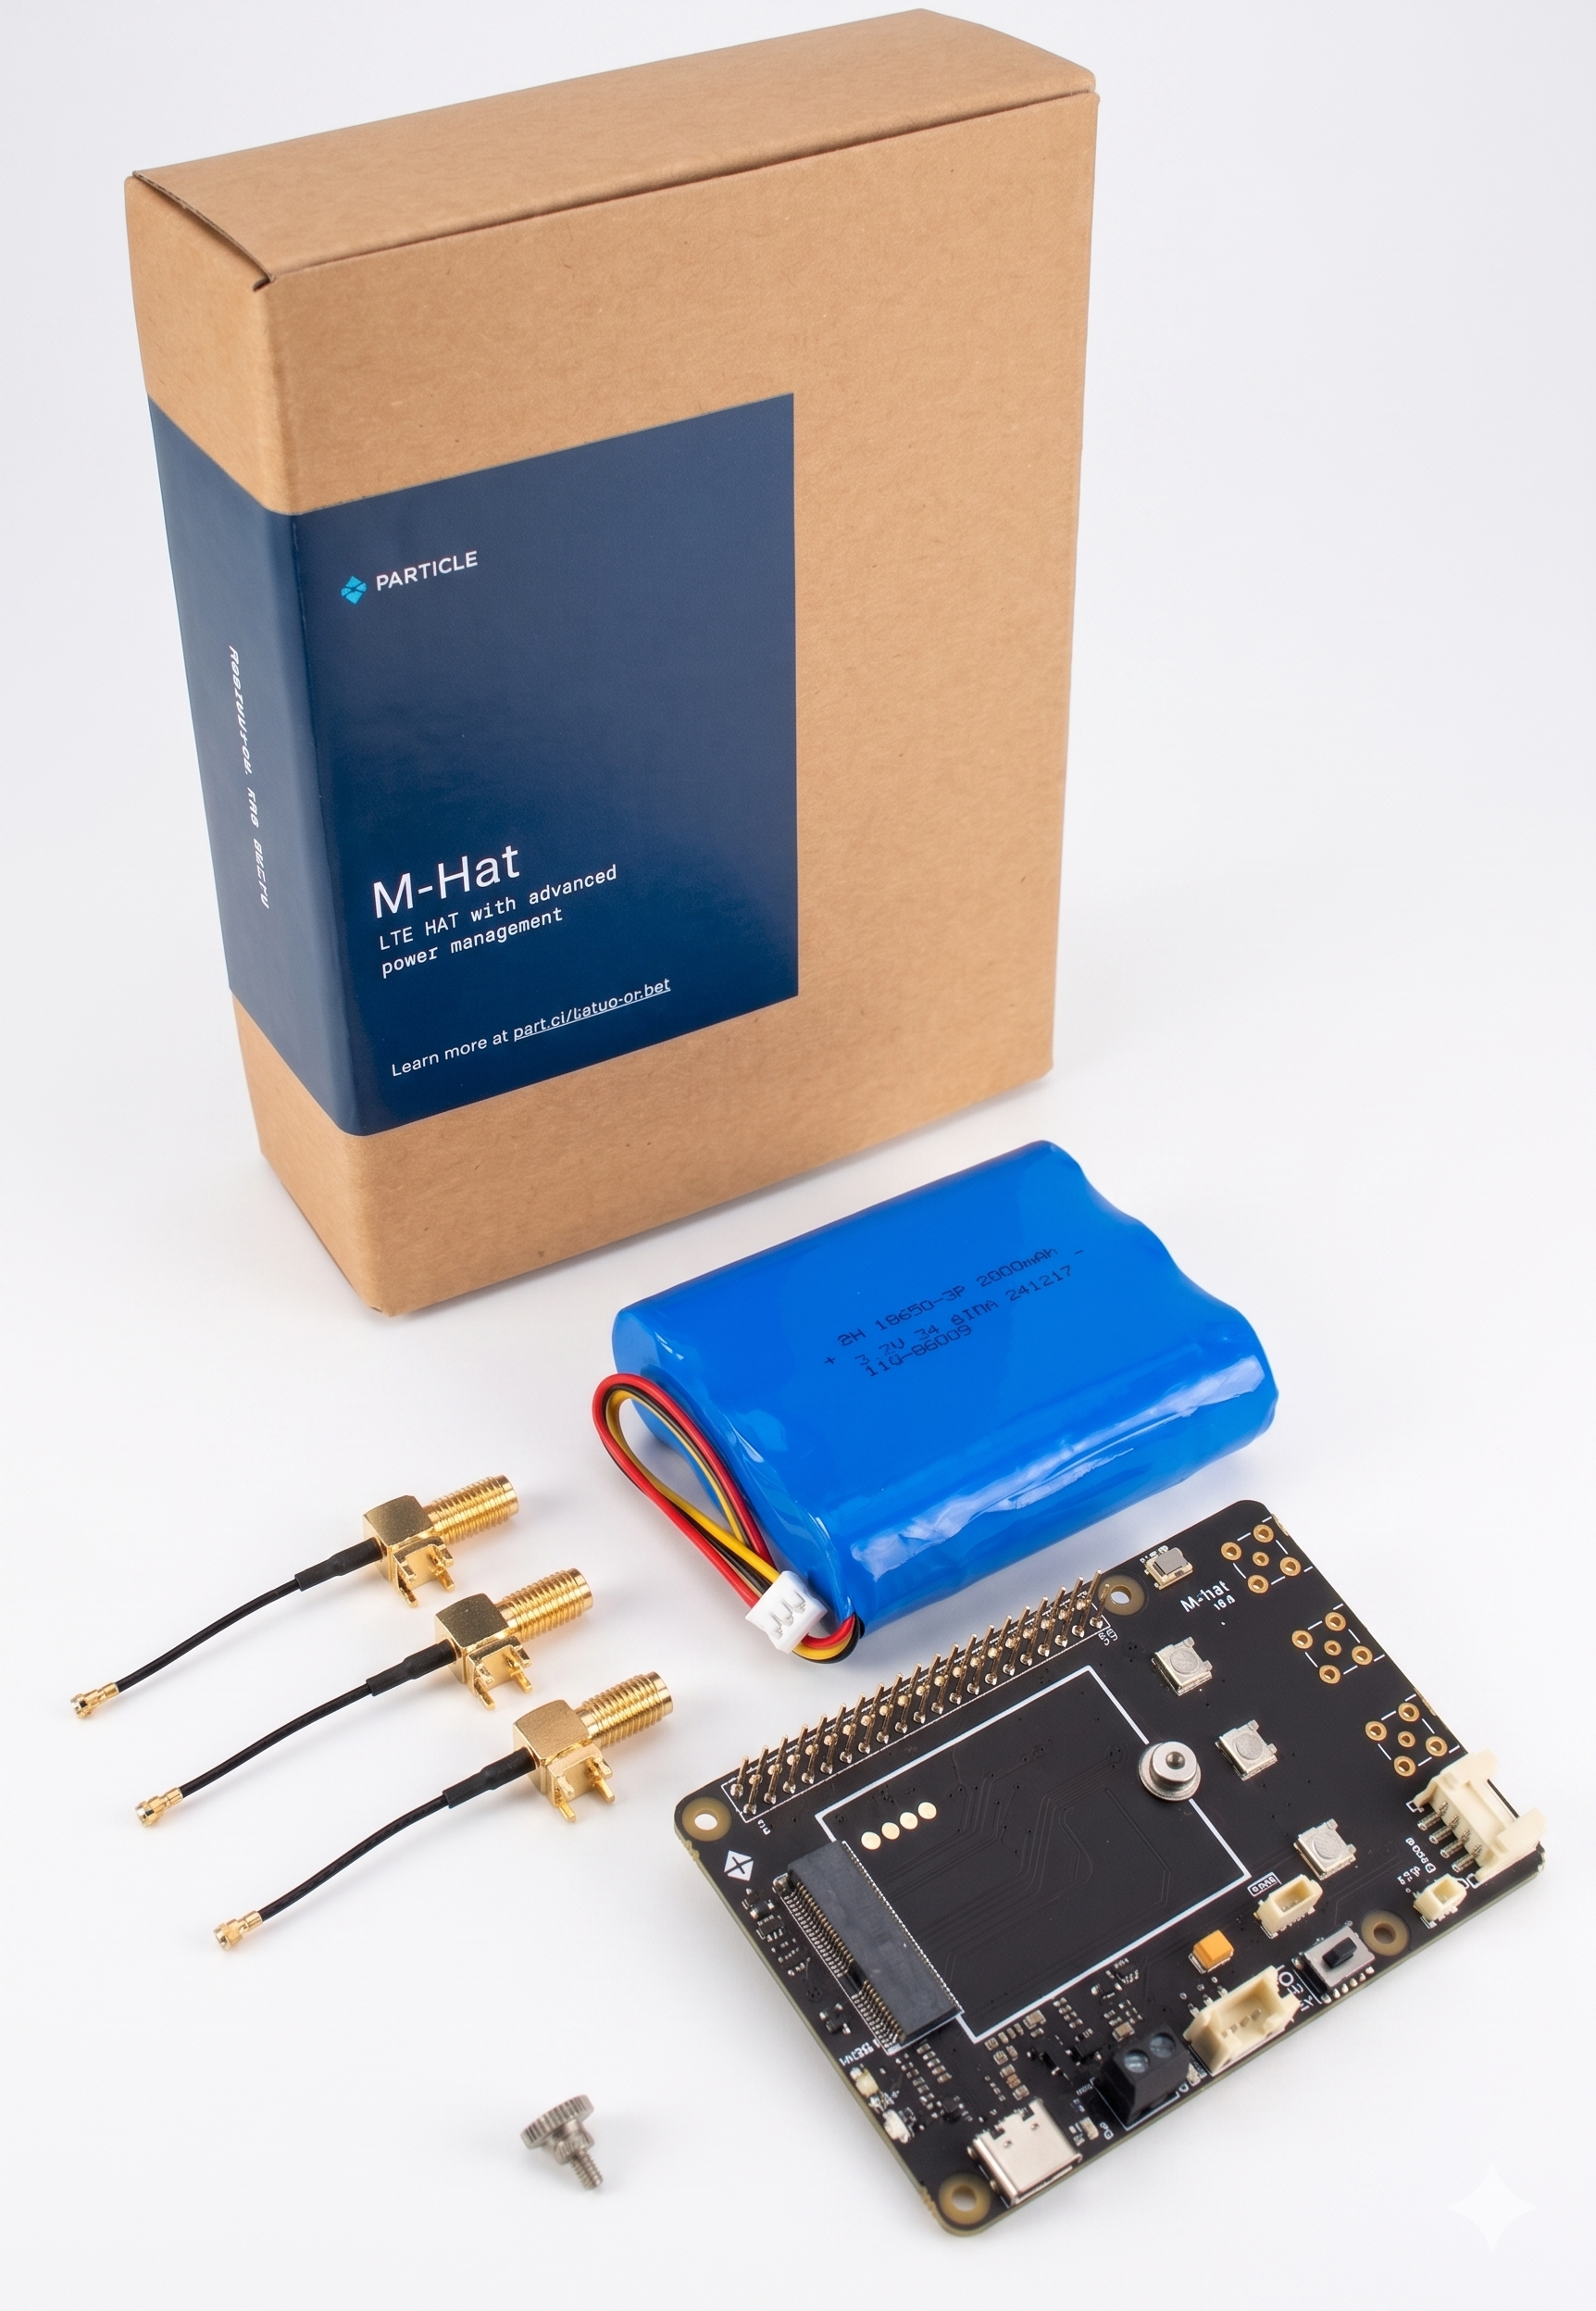
Inventory
| Item | Description | Usage |
|---|---|---|
| M-Hat board | The main Particle HAT board | Carrier board for the Particle SoM. Provides cellular connectivity and power management for your Raspberry Pi |
| 3-cell LiPo battery | 3.7V LiPo with 10K NTC thermistor, 3-pin JST-PH connector | Powers the M-Hat and Raspberry Pi when no USB-C or DC supply is connected |
| 3x SMA to U.FL adapters | Pigtail cables with SMA connector on one end, U.FL on the other | Allows an external SMA antenna to be connected to the U.FL connectors on the installed SoM |
| M.2 thumbscrew | SoM hold-down screw | Secures the Particle SoM in the M.2 slot on the M-Hat |
What You'll Need to Provide
These items are not included in the box but are required for setup:
- Raspberry Pi 3, 4, or 5 - the M-Hat mounts directly onto the Pi's 40-pin GPIO header
- USB-C PD power adapter - must support USB-C Power Delivery; standard 5V adapters will not work. See the Power Guide for full requirements.
- A computer - for initial SoM programming via USB-C (first-time setup only)
- USB-C cable - data-capable (not charge-only) for connecting the M-Hat to your computer during SoM setup
Checking the Installed SoM
The M-Hat does not ship with a SoM pre-installed. You will need to seat a compatible SoM in the M.2 slot and secure it with the included thumbscrew before the M-Hat can provide cellular connectivity. If you are purchasing a SoM separately, confirm it is a supported SKU - see Supported Hardware on the Introduction page.